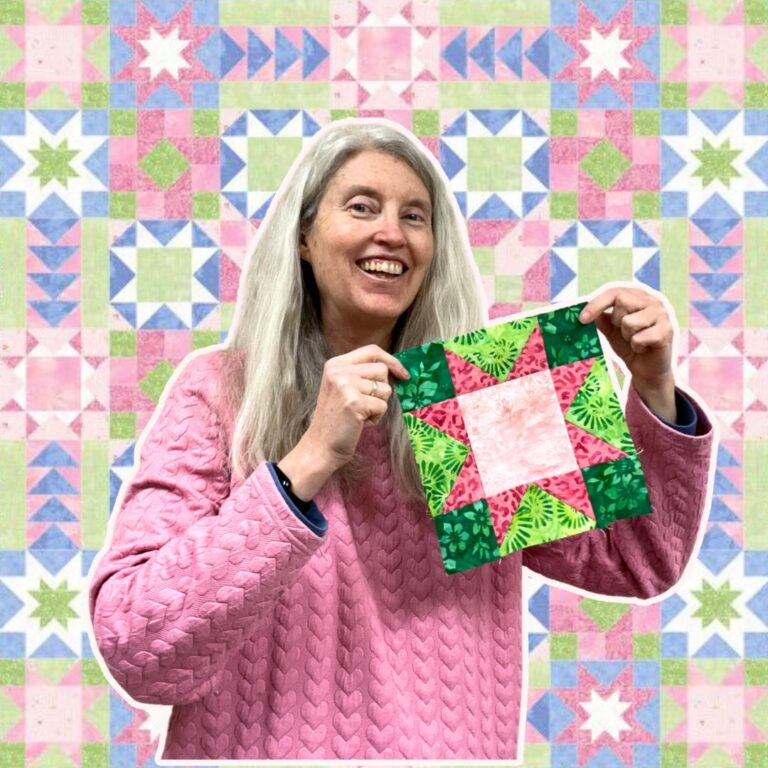
Stars in My Garden: Sawtooth Star – Green (Block 10)
Pinterest
Facebook
LinkedIn
Threads
Email
About the Quilt-Along
The Stars in My Garden quilt-along is a free series designed to guide you through creating a colorful, star-themed quilt. The guide for this quilt is available to download for free, and you can also join the Stars in My Garden email list to receive weekly reminders and links to written instructions and videos for each block.
Block One: Sawtooth Star
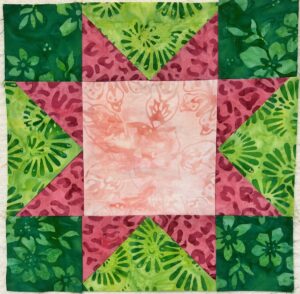
The Sawtooth Star is a classic quilt block and the centerpiece of our quilt. For this tenth week, you only need to make eight (8) blocks. We’ve made a Sawtooth Star as the very first block, but this one features two shades of green for the background.
Making the Block
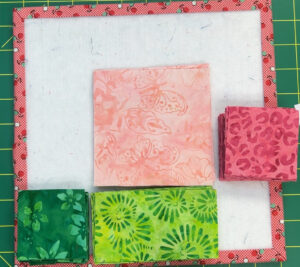
Materials Needed:
Eight (8) 4.5-inch squares for the center (light pink)
Thirty-two (32) 2.5 x 4.5-inch rectangles for the flying geese (light green)
Sixty-four (64) 2.5-inch squares for flying geese units – star points (medium pink)
Thirty-two (32) 2.5-inch squares for the block corners (medium green)
Make sure your pieces are pre-cut and sorted to make assembly easier.
2. Create Flying Geese Units
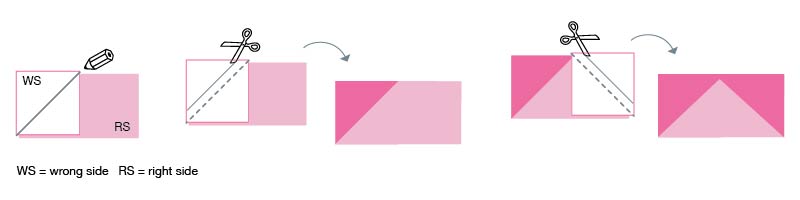
Flying geese units form the star points. Follow these steps to make them:
Step 1: Take one small medium pink square and place it on one end of a light green rectangle, right sides together. Draw a diagonal line from corner to corner on the square.
Step 2: Sew directly on the drawn line and press the square back to form a triangle.
Step 3: Trim off the excess fabric. Save the scraps for future projects or leader/ender sewing.
Step 4: Repeat this process on the other end of the rectangle to complete the flying geese unit. Make four flying geese units.
3. Assemble the Rows
Now that your flying geese are ready:
Arrange the flying geese, the center square, and the corner squares into three rows.
Sew the pieces of each row together, ensuring seams are pressed for a flat assembly.
Join the rows to complete the block.
Tips & Tricks
Scrap Management: Save trimmed-off triangles to create half-square triangles for another project.
Efficient Sewing: Mark all diagonal lines at once to streamline the sewing process.
Looking Ahead
Next week, we’ll tackle Block 11, which is a block we’ve not done before! There are a number of half-square triangles (HST) – so I know you’ll have no problem making the blocks!

One Response