The Stars in My Garden quilt-along is a free series designed to guide you through creating a colorful, star-themed quilt. The guide for this quilt is available to download for free, and you can also join the Stars in My Garden email list to receive weekly reminders and links to written instructions and videos for each block.
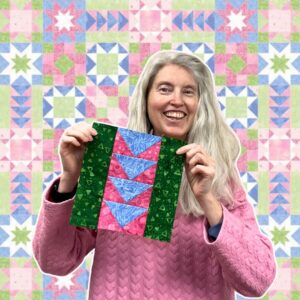
Block Twelve: Flying Geese
This week, we’re finishing up the blocks with another Flying Geese block – in pink and blue. These blocks will use:
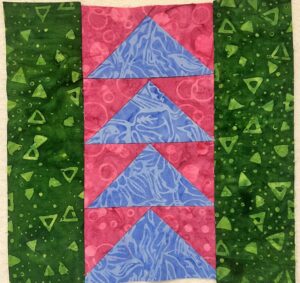
Four Flying Geese units stacked vertically
Rectangles for side rails
We’ll be making a total of two blocks this week. These will fill in the center block of the first and last rows of the quilt.
Materials Needed
Makes two (2) blocks:
Eight (8) 2.5″ x 4.5″ rectangles for flying geese (light blue)
Sixteen (16) 2.5″ x 2.5″ squares for flying geese units (medium pink)
Four (4) 2.5″ x 8.5″ rectangles for side rails (medium green)
Making the Block
1. Make the Flying Geese
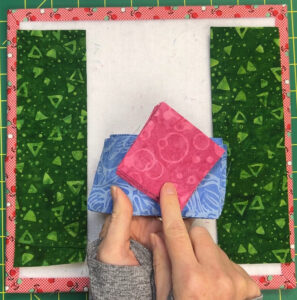
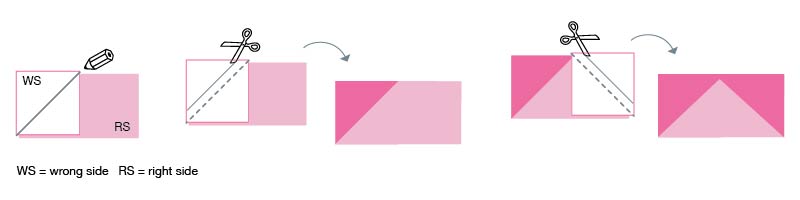
Step 1: Take one small square and place it on one end of a rectangle, right sides together. Draw a diagonal line from corner to corner on the square.
Step 2: Sew directly on the drawn line and press the square back to form a triangle.
Step 3: Trim off the excess fabric. Save the scraps for future projects or leader/ender sewing.
Step 4: Repeat this process on the other end of the rectangle to complete the flying geese unit. Make sixteen flying geese units.
I have a video on my YouTube channel that details making flying geese if you need more detail (plus some tips and tricks!).
2. Assemble the Blocks
Sew four Flying Geese units together to form a vertical column.
Add side rails to each side of the Flying Geese column.
Repeat for a total of two blocks.
You’re ready to put all the blocks together!
Tips for success
Fabric Placement: If you’re working with batiks, you’ll love that both sides of the fabric are the same—no need to worry about right or wrong sides!
Precision: Take your time with the Flying Geese units to ensure sharp, even points.
Batch Sewing: Chain-piece your Flying Geese to save time and keep the process efficient.
Looking Ahead
Next week I’m going to talk all about borders! One? Two? None? It’s just a matter of personal taste. I’ll give you fabric requirements and some very helpful hints to make perfect borders.
Resources & Links
Don’t forget to check out these resources to make your quilting journey easier:
Free Quilt-along Guide:Download it here to follow along with the written instructions.
Email List: Join the “Stars in My Garden” email list for weekly reminders and exclusive tips.

One Response