The Stars in My Garden quilt-along is a free series designed to guide you through creating a colorful, star-themed quilt. The guide for this quilt is available to download for free.
I also have a supplement to the guide all about borders. You can download that here (also free).
Borders: One? Two? None?
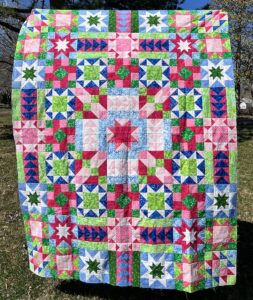
The blocks are all done and now it’s time to decide if you want to add borders. At this point the quilt measures about 56″ x 72″ – a nice large throw.
Borders can transform a quilt top, framing the design and adjusting the final size. You can choose a single border for a clean edge or opt for a double border to add more depth and dimension.
Adding a single border would give you a finished quilt of 64″ x 80″ (4″ border) OR 66″ x 84″ (6″ border).
Adding a double border would give you a finished quilt of 70″ x 86″. I opted for the double border.
Fabric Requirements
Single Border (Option 1):
7/8 yard for single 4″ finished border OR
1-1/2 yards for single 6″ finished border
Double Border (Option 2):
1/3 yard for 1″ finished inner border AND
1-1/2 yards for 6″ finished outer border
Backing & Binding
5/8 yard for binding
5-1/4 yards for backing (42/44″)
Preparing Border Fabric
Option 1
Cut seven (7) 4-1/2″ strips (for 4″ finished border) OR
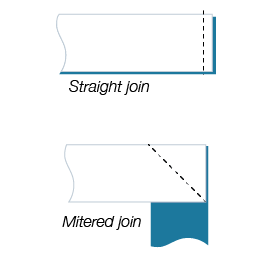
*You will need eight (8) strips if using mitered seam joins
Sew the short ends of the strips together. I like to miter my strips be sewing on a 45 degree angle, but you can certainly sew the ends straight across.
Measuring Border
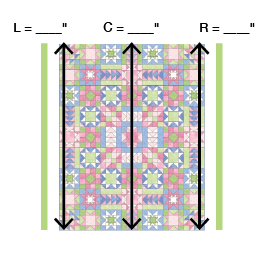
First Border - Sides
Lay out your pressed quilt top on a flat surface and measure the left side (L), right side (R), and down the center (C) of the quilt top. Add these three measurements together and divide by 3. (You can round to the nearest 1/4″)
Cut two (2) strips this length for the side (or inner) borders.
Attach strips to sides of quilt.
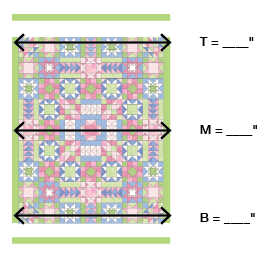
First Border - Top/Bottom
Lay out your pressed quilt top on a flat surface again.
Measure across the top (T), bottom (B), and middle (M) of the top. Add these three measurements together and divide by 3.
Cut two (2) strips this length for the top and bottom (inner) borders.
Attach strips to top and bottom.
You’ll repeat this process for the outer border if you are making the double border (option 2).
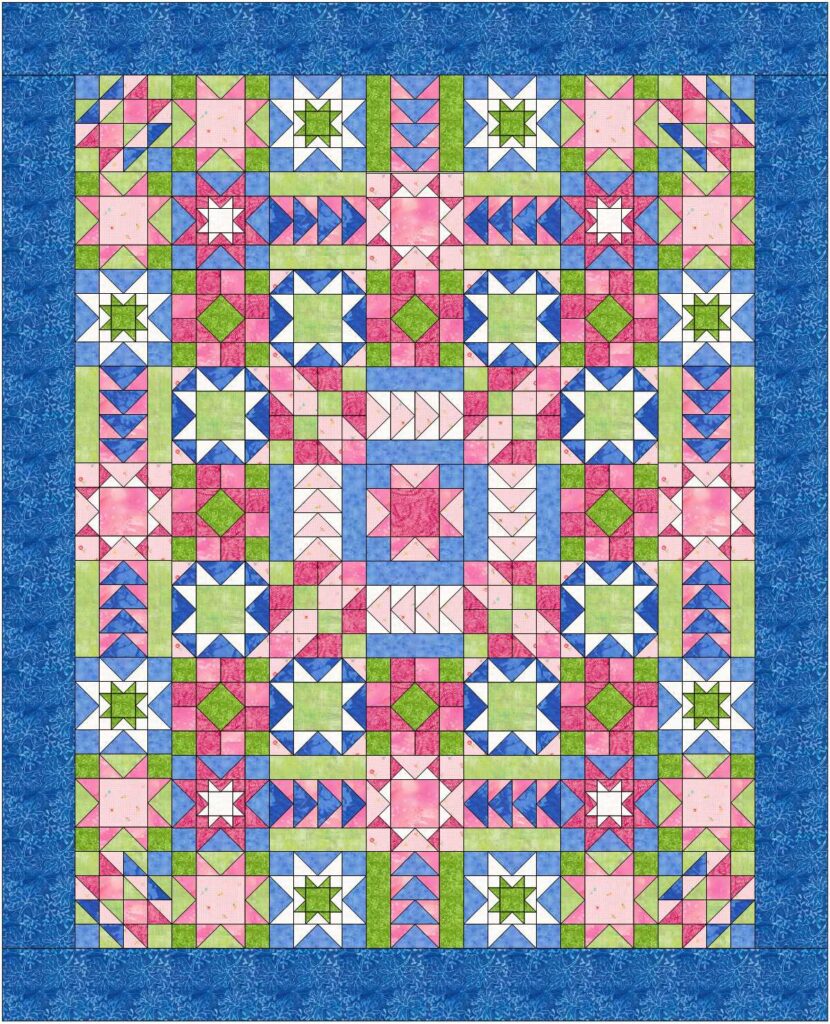
On the left is a mock-up of the quilt with a single border.
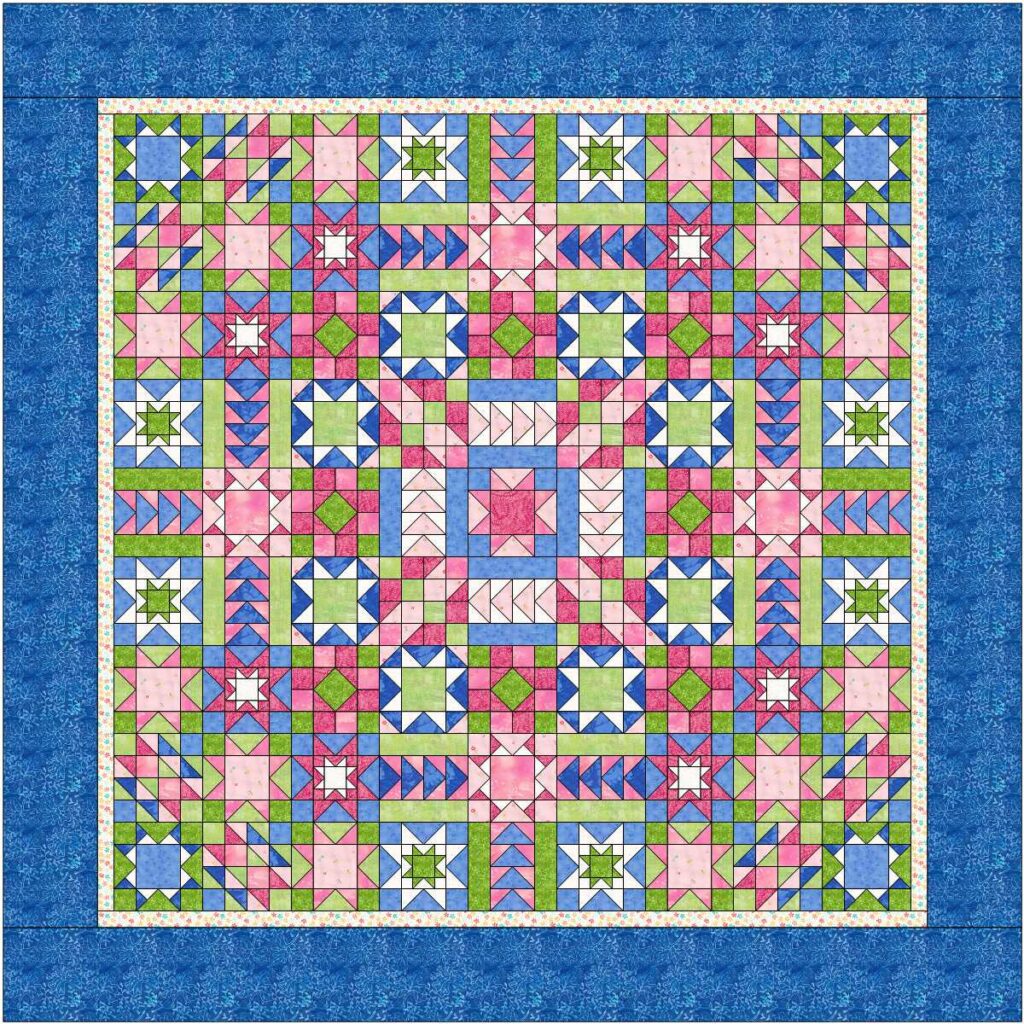
On the right is a mock-up of the quilt with a double border.
With borders, the quilt will be twin sized.
Making a queen sized version
If you need your quilt to be even larger, you could add more borders or consider adding a column of blocks on each side of the quilt (because it’s symmetrical). The additional blocks are the same as the first row with the addition of blocks for the corners (shown are Aunt Addie’s Album in a different color combination than used earlier in the quilt). Use your left-over fabrics or add new ones! This quilt finished at 92″ x 92″ with double borders.
Fabric Requirements
1/2 yard for inner border (1-1/2″ finished border width)
2-1/3 yards* for outer border (8-1/2″ finished border width)
*You will need 2-7/8 yards if using mitered join.
3/4 yard for binding
8-1/3 yards for backing (42/44″)
Cutting Border Fabric
Cut eight (8) 2″ strips (inner border)
Cut nine* (9) 9″ strips (outer border)
*You will need eleven (11) strips if using mitered join.
Follow the same steps above for measuring and cutting the border pieces.
Congratulations!
You’ve now completed the Stars in My Garden quilt! My quilt will be on display at Vintage Pink & Green in Snow Hill, Maryland for the next few months. There are a few kits available (kit includes fabric for all the blocks of the throw/twin size and DOES NOT include binding, borders, or backing).
Though this quilt-along is wrapping up, my weekly quilting tutorials continue! Over on my YouTube channel, expect Tutorial Tuesdays for general sewing and fiber arts, and Quilting Fridays for more quilting tips and projects.
Resources & Links
Don’t forget to check out these resources to make your quilting journey easier:
Free Quilt-along Guide:Download it here to follow along with the written instructions.
Email List: Join the “Stars in My Garden” email list for weekly reminders and exclusive tips.