
Inspiration
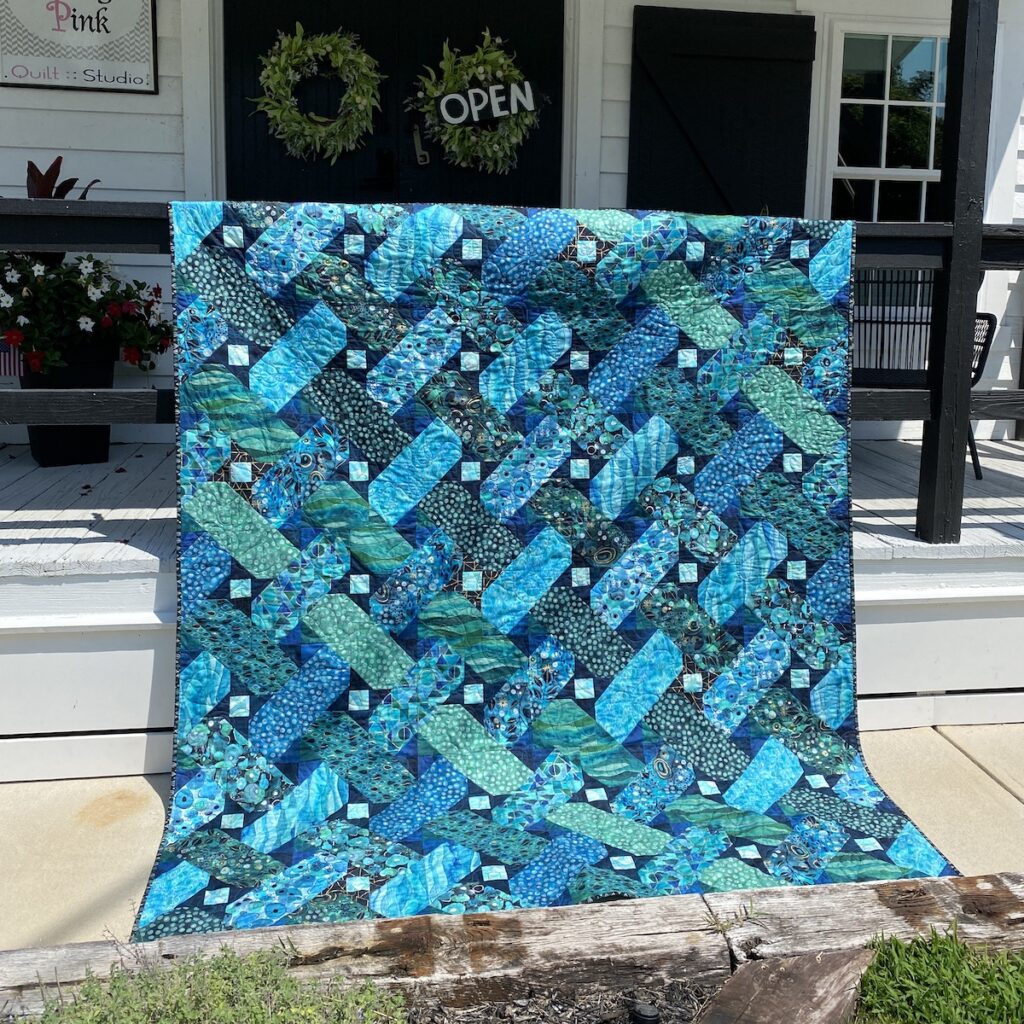
I’m thrilled to introduce you to my Ribbon Weave Quilt tutorial! I designed this pattern to showcase the beautiful “Ebb & Flow” fabric collection by Windham Fabrics. With its bold prints and stunning colors, I wanted a pattern that highlights these large-scale designs without cutting them into tiny pieces. The result is the Ribbon Weave Quilt—a project that’s all about simple rectangles, squares, and staying organized!
When I first saw the “Ebb & Flow” collection, I knew I needed a pattern that really let the fabric shine. The bold prints begged for a design with larger pieces, so I kept it simple and used mostly rectangles and squares. This not only preserves the integrity of the prints but also creates a striking woven effect across the quilt.
Getting started: Cutting & Sorting Your Fabric
The key to this quilt is all in the prep work. Start by cutting your fabric into the required strips according to the pattern instructions. These strips will then be sub-cut into either rectangles or squares. I like to stay organized by cutting all the pieces from one fabric at a time, stacking them, and setting them aside before moving on to the next fabric.
Here’s a quick tip: because some of these fabrics have similar colors or designs, it’s easy to mix them up. Keep your fabrics sorted into separate piles, and label them if needed. For this project, I used 12 main prints for the rectangles and additional fabrics for the squares.
Laying out the blocks: the Power of Organization
Now that your pieces are cut and sorted, it’s time to lay out your blocks. There are six different block configurations in this quilt, but they all follow the same construction method. The trick here is to stay organized. I recommend using design boards to keep each block’s pieces arranged as you sew.
A little tip: organize your fabric in the same order listed in the pattern. I even included labels in the pattern that you can cut out and use for easy reference. By keeping your fabrics organized in the order they’re used, you’ll save time and avoid any confusion while piecing the quilt.
Piecing the Quilt Blocks
1. Center Rectangle and Triangles: Each block begins with a large rectangle surrounded by triangles. To create these, start by sewing squares onto the corners of the rectangle using the stitch-and-flip method. Draw a diagonal line on each square, sew just inside the line, and then flip it back to form the triangle. Trim the excess fabric, leaving about a ¼-inch seam allowance.
2. Arranging the Layout: Once all your triangles are attached, it’s time to assemble the block. The first seam is only a partial seam attaching the small center square to the first rectangle. This creates an edge for the next rectangle to attach to. Carefully align your pieces, ensuring that all the seams match up, and sew them together. You’ll finish by completing the partial seam of the center square.
3. Special Block Variations: Some blocks will have a unique twist: they use a different fabric for the star points. The pattern will guide you on how many of these special blocks to make.
4. Continue Building: Repeat this process for each block. As you go, keep returning to your design boards to maintain the correct layout and organization.
Final Assembly: Putting the Quilt Together
Once all your blocks are sewn, it’s time to arrange them into rows and then into the finished quilt top. Because of the woven effect of this design, you’ll want to pay close attention to how each block connects to the next. The pattern includes a diagram to help with placement.
Tips for Directional Fabrics
Some of the fabrics in this quilt, like the leaf prints, have a directional pattern. For these, I took extra care to ensure the leaves followed the same direction across the block. If you’re using directional fabrics, I recommend double-checking the layout before sewing, so everything aligns neatly.
Wrapping it up!
The Ribbon Weave Quilt is a fun and visually striking project that really lets your fabric choices shine. With its focus on organization and straightforward construction, it’s a great project for quilters who want a design that’s both simple and sophisticated. Happy quilting!
Unfortunately, kits are no longer available.
One Response