Using the Rectangle Tool (Keyboard Shortcut: M)
This was likely one of the first tools you learned to use in Adobe Illustrator. It’s quick and easy to draw a rectangle – and even a square. You may not realize that there are a number of settings available to assist you in creating a rectangle of a specific size and with certain attributes.
In this exercise, we practice making and manipulating rectangles. I’ll always refer to the keyboard shortcut as the easiest way to invoke the rectangle tool.

Draw a Basic Rectangle
This is the perfect opportunity to imbed the keyboard shortcut into your memory! Hit “M” on the keyboard to invoke the rectangle tool.
Click and drag to draw the rectangle. NOTE: I choose fun colors for the fill and stroke rather than use the default white fill/black outline.

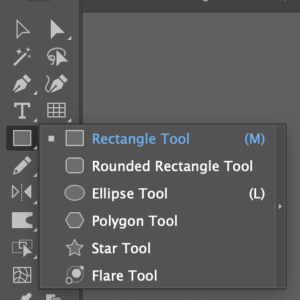
Forget the shortcut? It’s shown on the shape fly-out menu.
Draw a Square

Hold SHIFT while dragging
This is just like making a rectangle, except you hold the “SHIFT” key while dragging the cursor. You’ll see a faint red diagonal line in your square indicating that it is indeed square. Releasing the “SHIFT” key and your square likely reverts to a rectangle and the red line is gone. Press the “SHIFT” key again and your shape will snap back into being a square. Be sure to release the mouse button BEFORE you release the “SHIFT” key to maintain the shape as a square.
Draw from the Center Point
When drawing a rectangle, the starting point is usually the upper left corner. You click where you want that point to be and then drag to where the lower right corner is of the rectangle. Technically you can start in the lower left and move to the upper right as well. The point is that Illustrator starts at one corner and ends at the diagonally opposite corner.
What if you wanted to draw from the center point of the rectangle? It’s easy! Hold the “OPTION” key as you drag. To make a square from the center, also hold the “SHIFT” key while dragging.

Draw the Precise Size
Many times I’m drawing rectangles “on the fly” – not really sure of their exact dimensions until I eyeball where they go. However, there are a number of times that I know exactly how big the rectangle or square needs to be.
Good news! You can get Illustrator to deliver that precise shape with the click of the mouse.
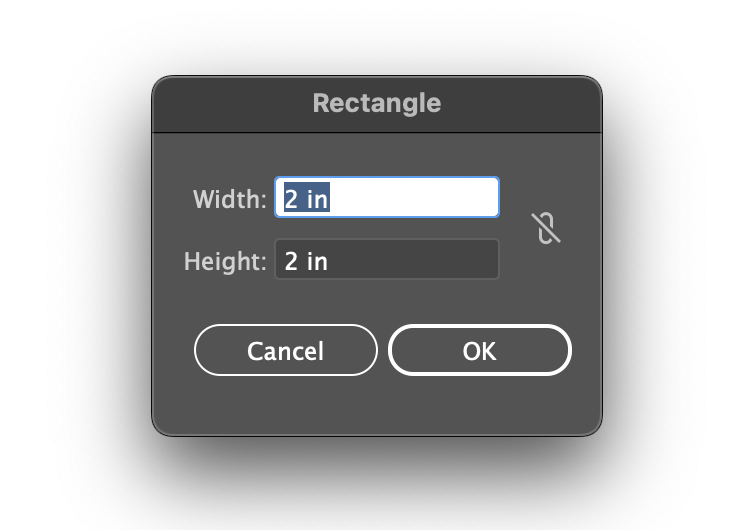
Instead of clicking and dragging, just click where you want the shape to “begin.” A pop-up appears asking for the width and height.
The units will be whatever the default is for this project, but you can certainly change them as well. For instance, if your file is defaulting to inches, you can create a 300 px by 500 px rectangle by simply typing “300px” and “500px” respectively. Note that if you don’t put any units, then it assumes the default unit.
Want to draw a precise size from the center? Hold the “OPTION” key then click the center point. Fill in dimensions and the shape will be rendered from that center point.
Rounding the Corners
Want your rectangle to have rounded corners? There is a tool on the fly-out shape menu you can select as there is no keyboard shortcut.
However, I find it easier to just draw a rectangle and then use the radius handle to adjust the roundness of the corners.
Illustrator will round all the corners the same by default.
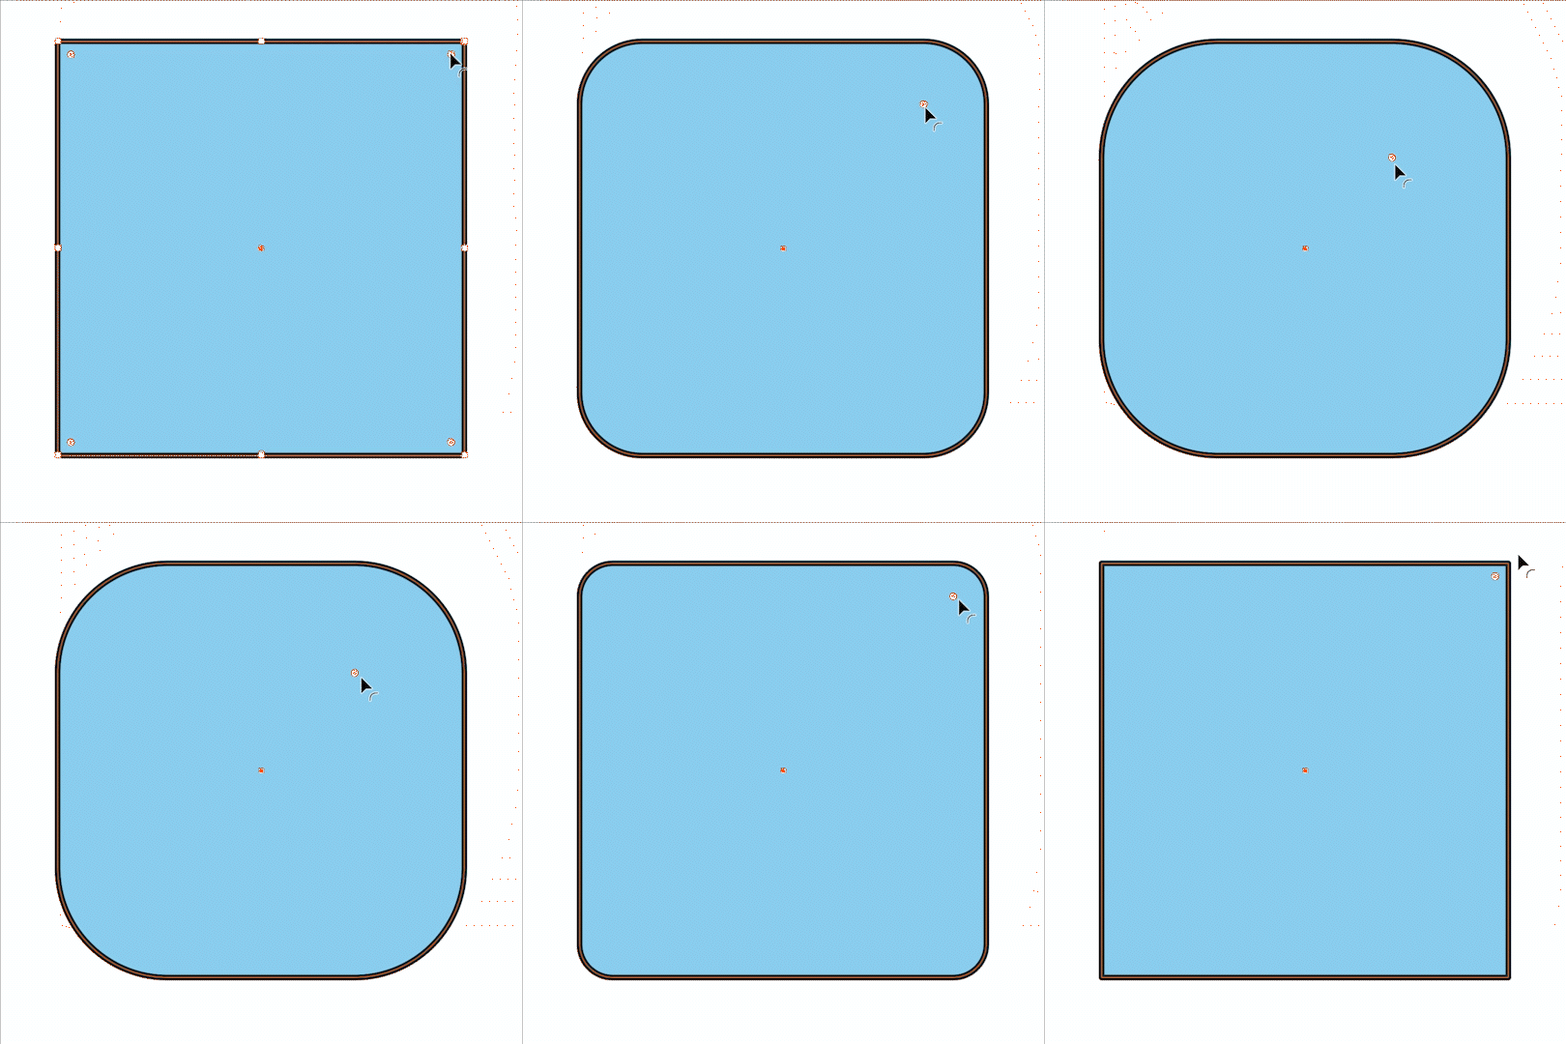
If you want more precision or have different radius values for each corner, just double-click on the radius handle to get the Transform dialog box.
Here you can adjust the width and height of the rectangle, angle, and the corner radius of each corner. By default the values are linked so if you change one, they all change to that value. You can unlink them by pressing the button in the center and then adjusting the values one by one.
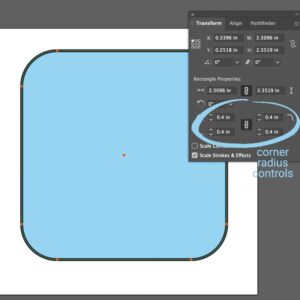
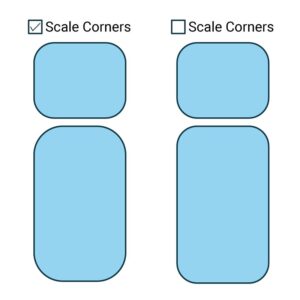
There are two check boxes: Scale Corners and Scale Stokes & Effects.
If Scale Corners is checked, then the radius will increase or decrease as the rectangle is scaled larger or smaller. That is – the value of the radius will change to be in proportion with the size of the new rectangle.
If left unchecked, the radius will remain the value you set. This is helpful when you have a design that has multiple rectangles and you want all the corners to be identical, regardless of the size of the rectangle.
Want to learn more tips like this?
Coming soon! Designer Membership. Monthly membership for surface pattern designers wanting to conquer the design process faster and more efficiently in Adobe Illustrator.
Get on the list to be the first to know when the membership opens.

