
Welcome back to the Haven Quilt-Along! We’re officially in Week 3, and this is the final week of working on border components. If the first two weeks were a warm-up, this one builds a bit more momentum—without adding stress.
Units to make
Six different flying geese color combinations
Eight units of each combination
All units are constructed the same way—only the fabrics change
These flying geese are for the border, so they won’t be needed until later in the quilt-along. You’re welcome to make them all now, or—if you prefer—work them in gradually while sewing other blocks.
Construction method
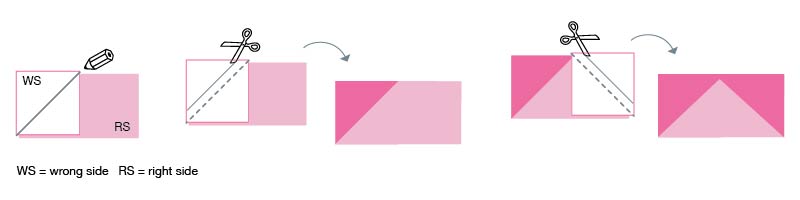
Mark a diagonal on the squares on the wrong side of the fabric. This will be the sewing line.
Align square at one end of the rectangle, right sides facing
Sew just slightly off the marked line (on the side of the fabric that will be cut away) for a better fold-over
Press towards rectangle.
Repeat with other square which is placed on opposite end of rectangle. Make sure your seams meet to form a triangle and not a parallelogram (this part matters!)
If this is your first time making flying geese, I have an in-depth flying geese tutorial with extra tips and troubleshooting.
Want a detailed PDF instruction sheet? Join the HAVEN mailing list and get each week’s instructions right in your inbox!
Kits available from Vintage Pink & Green (in store or online).
One Response